How to Draw Chrysanthemums From Real Garden Flowers
23 Sep, 2026
12 Views 0 Like(s)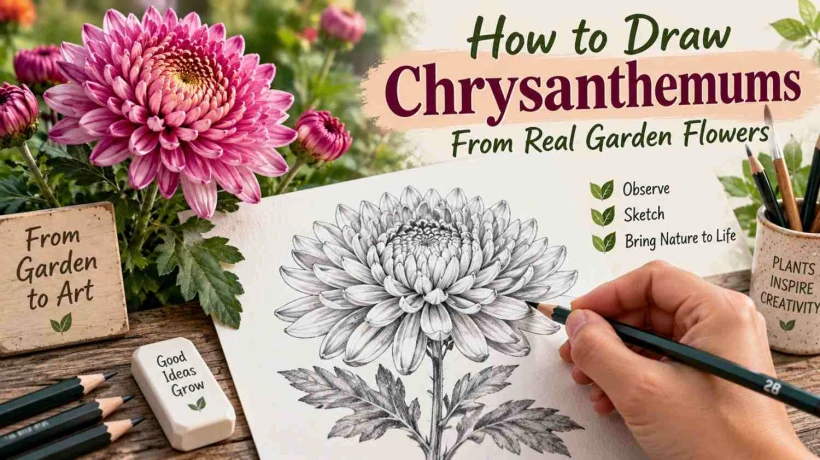
Learn how to use real garden chrysanthemums as drawing references, with practical tips for observing petal shape, flower structure, shading, leaves, and natural details.
Chrysanthemums look intimidating to draw at first glance, with their dozens of thin, curling petals packed tightly around a small center. Most beginners either give up halfway through or end up with a flat, cartoonish blob instead of a flower that reads as real. The good news is that once you understand the actual structure hiding under all those petals, drawing one from life becomes a lot more manageable than it looks.
Working from a real garden flower instead of a photo makes a bigger difference than people expect. You can turn the bloom slowly, watch how petals overlap in three dimensions, and see exactly how light falls across the curves. This guide breaks the process into stages that build on each other, so by the end you have a chrysanthemum drawing with real depth and movement instead of a flat pattern of lines.
Pick a Good Reference Flower First
Not every chrysanthemum makes an easy first subject. Look for a bloom with a clear, visible center and petals that curve outward in a fairly even pattern, since fully double blooms with hundreds of tightly packed petals can overwhelm a beginner. Spider and quill type mums, with their longer, more separated petals, are often easier to follow than dense pompon varieties.
Set the flower where natural light hits it from one clear direction rather than scattered light from multiple windows. A single strong light source creates defined shadows between the petals, and those shadows are what will eventually make your drawing look three dimensional instead of flat.
Start With the Basic Shape, Not the Petals
The biggest mistake beginners make is diving straight into individual petals before establishing the overall form. Start by lightly sketching a simple circle or slightly flattened oval to represent the general outline of the bloom as a whole. This shape acts as a container that keeps your petals from drifting outside the natural silhouette of the flower.
Inside that outline, mark a small circle or dot near the center to show where the petals will radiate from. Real chrysanthemums are not perfectly symmetrical, so resist the urge to make this too precise. A slightly uneven center actually makes the final drawing look more like a living flower and less like a technical diagram.
Build Petals in Layers, From Back to Front
Chrysanthemum petals grow in overlapping rings, with the shortest petals near the center and longer ones curving outward toward the edges. Draw the back layer of petals first, the ones partially hidden behind the front layers, using simple curved lines that follow the direction each petal points. These background petals do not need much detail since they will be mostly covered anyway.
Once the back layer is in place, add each following ring slightly larger and positioned to overlap the layer behind it. Vary the curve and length of individual petals rather than repeating the same shape over and over, since real flowers never grow with that kind of mechanical uniformity. Pay close attention to how the petals near the front curl slightly upward or downward, since this curl is what gives the flower its sense of volume.
Use Shading to Create Real Depth
Once the petal structure is fully sketched, shading is what turns a flat outline into something that looks like it exists in space. Identify where your light source is hitting the flower directly, and leave those areas lighter while adding darker shading where petals overlap and cast shadows on each other. The base of each petal, closest to the center, is usually darker than the tip, since less light reaches into those tight, curled sections.
A soft graphite pencil or blending stump works well for smooth gradients between light and shadow. Building up shading gradually in light layers, rather than pressing hard right away, gives you more control and makes it easier to fix mistakes as you go.
Add the Center and Final Details
The center of a chrysanthemum is often made up of tiny, tightly packed disc florets that can look like a cluster of small dots or short lines from a short distance. Rather than trying to draw each individual floret, suggest the texture with small clusters of short marks, varying their density slightly to avoid a too regular, stamped pattern. A touch of darker shading right at the very center helps it recede visually behind the surrounding petals.
Once the flower itself feels complete, step back and check for any petals that broke the original silhouette established earlier. Small corrections at this stage, tightening a stray line or deepening a shadow, often make a bigger visual difference than another hour of detail work.
Practice With Multiple Angles
Drawing the same chrysanthemum from a three quarter view, straight on, and from slightly below all teach different lessons about how the petal layers stack and overlap. Rotating the actual flower between sketches, rather than only imagining new angles, keeps the proportions accurate and prevents the kind of guesswork that leads to flat, unconvincing shapes.
For a broader look at rendering different flower forms, textures, and shading techniques step by step, the Chrysanthemum Drawing guide on Zoned Garden walks through several petal structures side by side, which helps build a stronger sense of how different blooms compare.
Final Thoughts
Drawing chrysanthemums well comes down to patience with structure before detail, not natural talent with tiny petal shapes. Build the basic form first, layer the petals from back to front, and let shading do the heavy lifting for depth. Practice with a real flower a few times, and what once looked impossibly complex starts to feel like a manageable, repeatable process.


Comments
Login to Comment